
From install to first agent
Grove gives each agent an isolated workspace, one git worktree, one branch, one tmux session, by default in a container, scoped to the repository it launches from.
Prerequisites
| Platform | Requirement |
|---|---|
| Linux | git ≥ 2.30, tmux ≥ 3.0 |
| macOS | git (Xcode CLT), tmux (brew install tmux) |
| Windows | WSL2 with the above. Windows-native runs only the non-tmux subcommands (grove version, grove config show, grove debug). The TUI needs WSL. |
Install
Grove publishes to PyPI as grove-factory and installs to your user bin
(~/.local/bin) as grove. One package carries the whole factory: the
TUI, the CLI, the daemon, the MCP server and a prebuilt web dashboard.
There are no extras to pick.
The distribution is grove-factory, not grove
grove on PyPI is an unrelated log-collection framework. A bare
uv tool install grove (or pipx, pip) installs that instead,
failing with Failed to initialise configuration handler. Grove
publishes as grove-factory. The command it installs is still
grove. See Troubleshooting if this happened.
uv isolates Grove and links grove
onto your $PATH.
uv tool install grove-factory     # install the latest release
uv tool upgrade grove-factory     # pull a newer release later
uv tool uninstall grove-factory   # remove
To try it once without installing, run uvx --from grove-factory grove.
No uv yet? curl -LsSf https://astral.sh/uv/install.sh | sh.
Releases and updates
Every release is cut on GitHub, and publishing it ships the same version
to PyPI within minutes. uv tool upgrade grove-factory pulls the newest
one, and uv tool install grove-factory==<version> pins a specific
release. The releases page
lists what changed in each.
- Stable is PyPI, the default above. It moves only when a release is published.
- Bleeding edge installs straight from the
currentbranch withuv tool install "grove-factory @ git+https://github.com/bearlike/Grove". It includes everything merged since the last release, but a git install carries no prebuilt web dashboard. - After an upgrade, relaunch
groveand restart a running daemon and dashboard. They are long-lived processes and keep serving the old version until restarted.
The web dashboard
The dashboard ships inside the package, prebuilt, along with the Node.js runtime that serves it. There is nothing else to install, and a Node you already have is never touched.
grove daemon serve     # terminal 1, the API on 127.0.0.1:7421
grove web              # terminal 2, the dashboard on 127.0.0.1:3000
Open http://127.0.0.1:3000 and pair the browser. Web dashboard covers pairing, a phone on the LAN, and running both as services.
Tab completion (optional)
One command teaches your shell to complete Grove, including live values: workspace ids, your configured agents, each agent's models, branches and sessions.
It writes one file where your shell already looks and never edits your rc file. See tab completion for what completes where, and what to do if nothing happens when you press Tab.
Configure it
Grove runs on defaults you can tune later, from two files that layer
together. The project config at <repo>/.grove/config.json
(scaffolded by grove config init) is committed and shared, pinning the
agent roster, worktree layout, and workspace init script. The user
config at ${user_config_dir}/grove/config.json (~/.config/grove/config.json
on Linux) holds your personal defaults across every repo. The project
layer wins on a shared option.
Let an agent configure it for you
Hand this prompt to Claude Code, Codex, or any coding agent to configure it with you.
Read https://raw.githubusercontent.com/bearlike/Grove/current/.claude/skills/configuring-grove/SKILL.md. It is the skill for configuring Grove, a software factory for coding agents. Help me write my Grove user and project config, and verify every field against my installed version with `grove config schema --stdout`.
Or write it yourself
Project setup, Agents, and Init scripts cover each by hand. Every field is in the Configuration reference, and the Configuration cascade explains the six layers.
First run
cd path/to/your/git/repo
grove config init      # writes .grove/config.json with sensible defaults
grove                  # launch the TUI
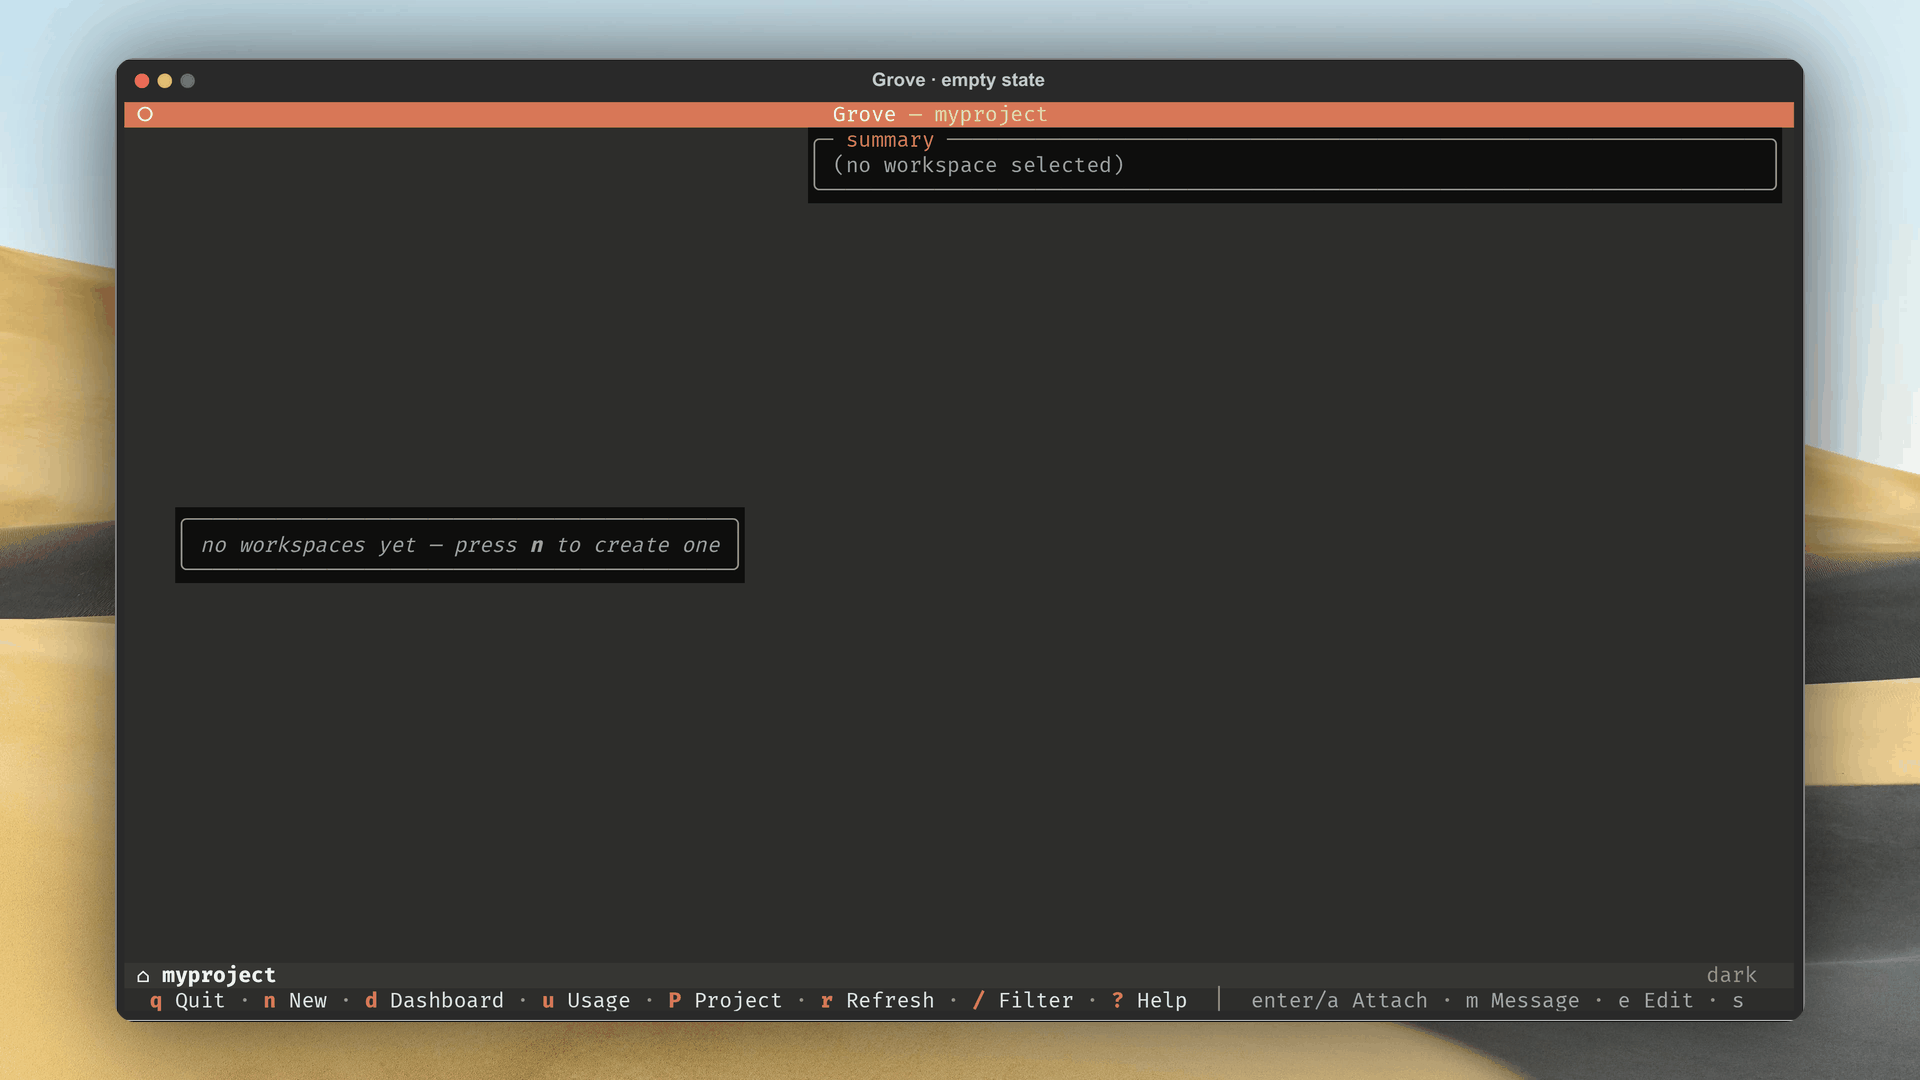
A fresh repo lands on the empty state, prompting a first workspace.
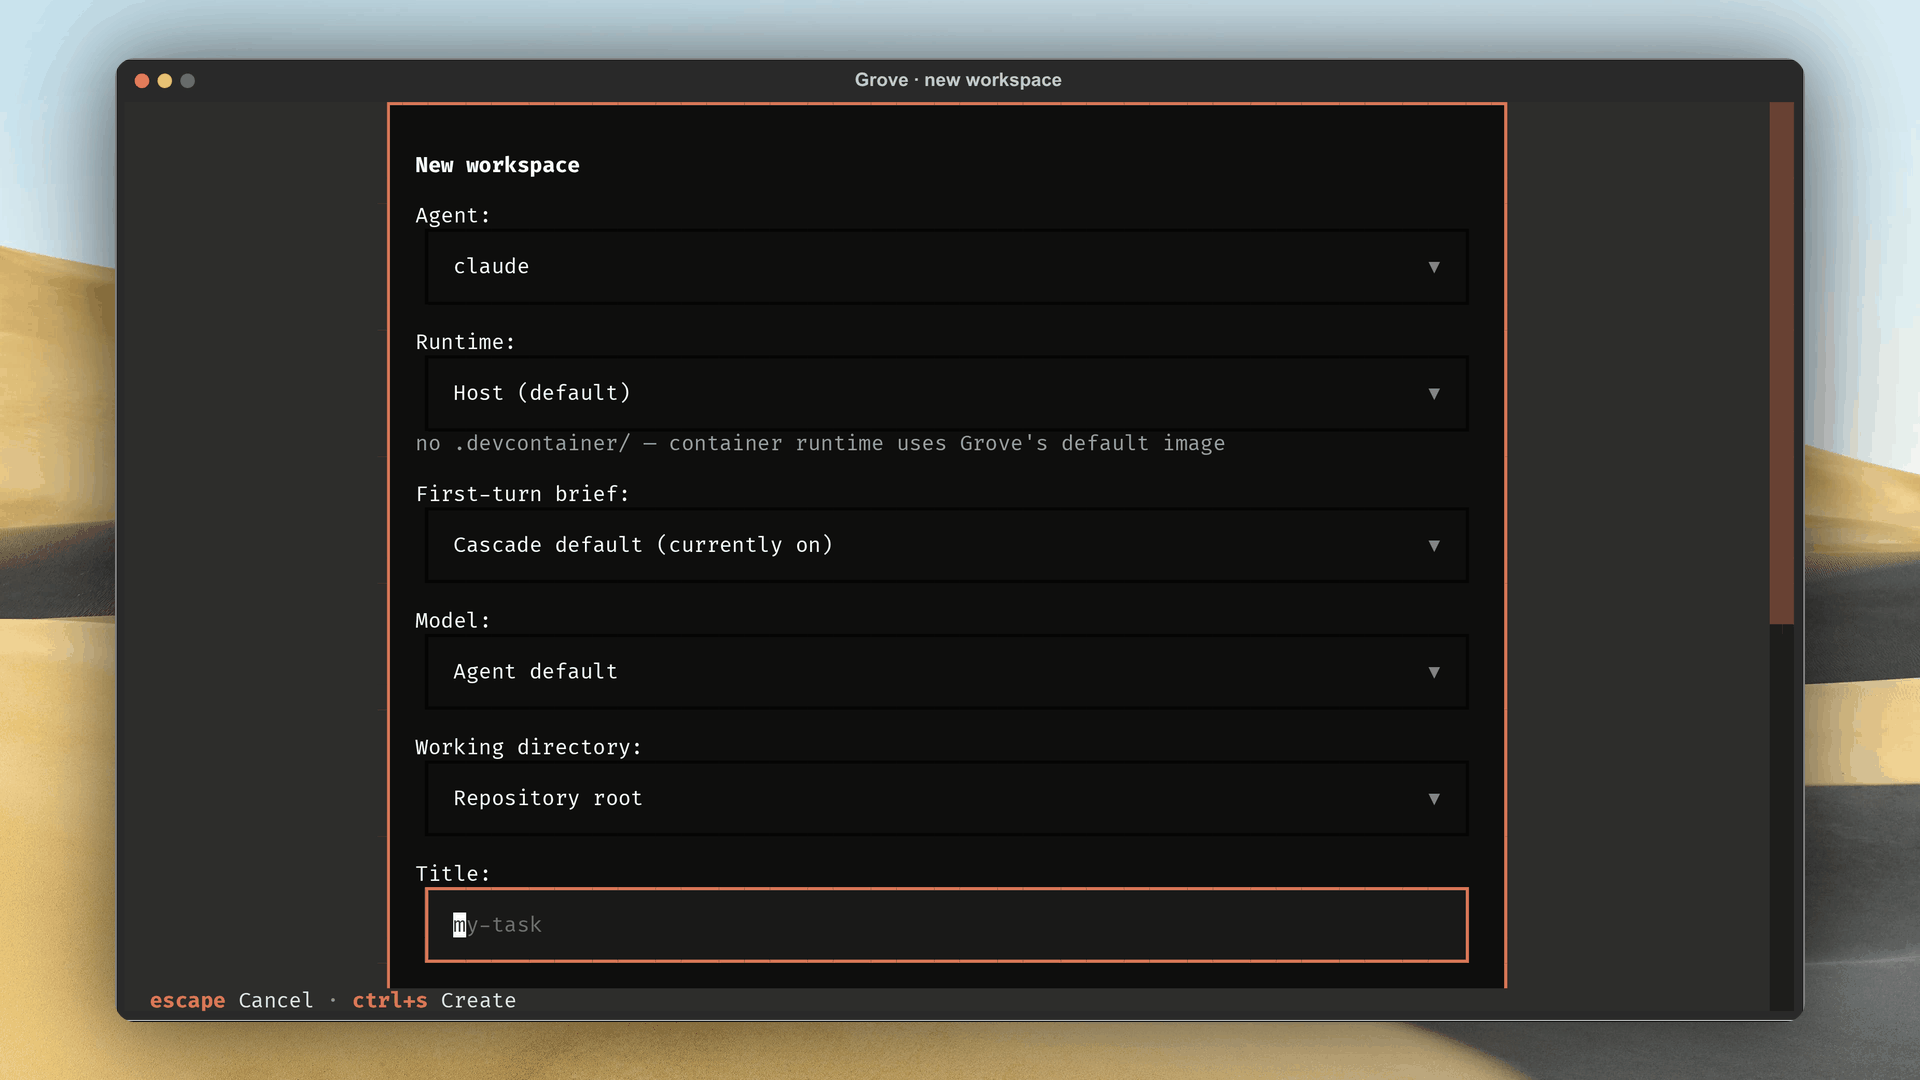
Press N, pick an agent, choose a branch source, and type a title.
Grove resolves the branch, creates the worktree, runs the init script if
configured, spawns a tmux session with agent and shell windows, and
sends in the agent's command.
Press Enter or A to attach. Press Ctrl+B then D to detach. The workspace keeps running, and the activity rail flips ACTIVE/IDLE on its own.
Verify
grove version          # prints the installed version
grove debug            # prints the resolved config + state paths
grove ls               # JSON list of this repo's workspaces
Set GROVE_DEBUG=1 for verbose loguru output on stderr, with one
initialized <path> line per directory created on first run.
Next steps
- TUI tour, every screen and keybinding.
- Project setup, the per-repo
.grove/config.json. - Custom agents, wiring Aider, Cursor, or any command.
- Daily workflow, create, attach, pause, resume, kill.
- Agent activity and sessions, the fleet on one wall, replayed.
- Web dashboard, the fleet in the browser or your phone.
- MCP server, for MCP agents. It ships in the same install as
grove-mcp.